Use a slower exposure on your scenic shots to transform water to a pleasing blurMost of the time in photography it’s best to use a fast shutter speed. This is so you can capture action full of detail, keep moving subjects crisp and avoid the unwanted blur of camera shake.
However, there’s a whole world of exciting creativity to be explored by shooting with a purposefully slow shutter speed. You can transform moving subjects into poetic blurs, create abstract shots by purposefully moving the camera, discover hidden detail in the dark and get arty by painting subjects with light. Here’s four great techniques you can try that all involve setting a slow shutter speed.
Long exposure landscapes
A trick many landscape photographers use to create truly stunning scenics is to use a really slow shutter speed. This means that anything moving in the image – such as flowing water or drifting clouds – take on a blurred and intriguing appearance, but everything else stays pin sharp.
To do this, it’s best to set your ISO to its lowest setting: on most cameras this is 50 or 100, so set yours to the lowest value available. Switch your shooting mode to Aperture priority (A or Av in the shooting mode options) and dial in the largest f/number you can get. This will be determined by your lens, but most can be set to at least f/22. This means the aperture is as narrow as possible, so the least amount of light is passing through to your sensor. Because of this, your camera is forced into using the longest possible shutter speed that the light levels allow in order to produce a balanced exposure. The actual shutter speed you can achieve will depend on how bright the conditions are, but in most cases you’ll find you’re shooting with an exposure time from 1 second to 30 secs or more.
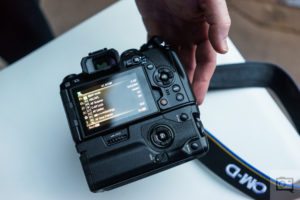
Set your camera up in Aperture priority (A or Av on the mode dial)
As you’re now shooting with a much slower shutter speed than usual, you’ll need to keep your camera steady during the exposure, so it’s best to use a tripod. To minimise the risk of camera shake, either set a 2sec self timer or use a remote shutter release, so you don’t transfer movement to the camera when you take the shot and blur the entire image.
If you’re shooting in bright daylight conditions and want to shoot with an even slower shutter speed, you’ll need to add a Neutral Density (ND) filter to the front of your lens. This acts a bit like a pair of sunglasses, and reduces the amount of light passing through to your sensor.
Use a Neutral Density filter to shoot with ultra slow shutter speeds in bright daylight
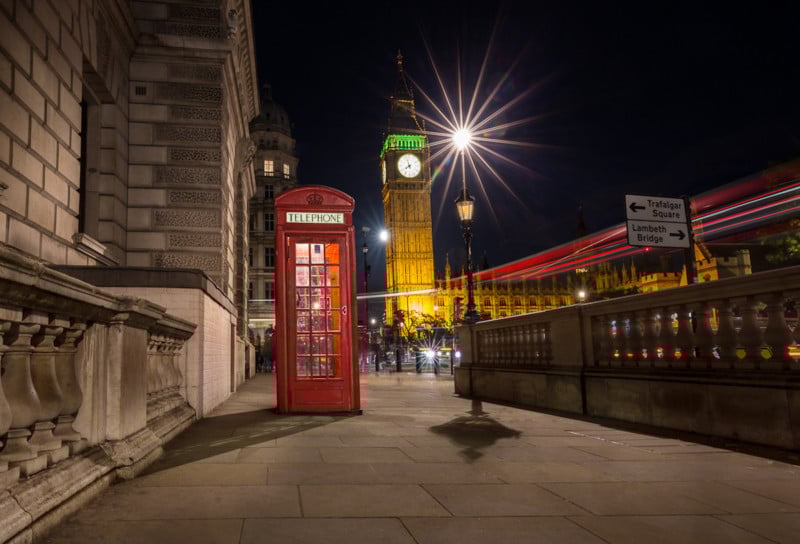
Try out this technique at night and capture the rushing light trails of moving cars
Creative blurs
Another way you can use a slow shutter speed to get artistic with blur is to move the camera during the exposure. This will transform all detail into pleasing smudges and streaks, giving your shot a more abstract or impressionist feel. It works really well on subjects like trees, high rise buildings or flat landscapes, but try it on a range of subjects and see what you can achieve.
For this technique, you don’t need a tripod, you just need to set a slow shutter speed. To reduce your camera’s sensitivity and maximise image quality, set your ISO to its lowest possible setting: often this is ISO 100. Ideally, you want a shutter speed of around 1sec, so switch your shooting mode to Shutter priority (S or Tv on the mode dial) and dial in your preferred shutter speed. Aim for 1sec, but if your aperture value is flashing or reads ‘Hi’ then the scene is too bright for that exposure. To get around this, either dial in a slightly quicker shutter speed such is 1/2sec or seek out a darker subject.
Begin by focusing up on your subject, and then once set switch the focusing to manual mode to keep it locked. You’ll need to ‘pan’ your subject, meaning your camera moves across or up the scene throughout the exposure. Start off by framing up at the base of a tall subject or to the left of a scene, begin moving the camera up or across and then press the shutter button. Continue moving the camera with a fluid motion throughout the exposure, until just after the shutter has closed. Take a look at the results on screen, and be amazed at the arty image you’ve just created!
Use a slow shutter speed and camera motion to achieve this painterly effect
Starry skies
One of the most magical things you can shoot with your camera is the night sky. With the right settings, you can record a level of detail that is invisible to the naked human eye. The dust and gas clouds of the milky way appear in your images, and thousands of stars sparkle across the sky.
To capture the heavens, you need to begin by setting your camera up on a tripod, so that it remains perfectly still during the exposure. Ideally you’ll want a fairly wide angle lens, and an 18-55mm kit lens at its widest view is a great option.
Set your camera’s shooting mode to Manual (M on the mode dial) and begin by opening up your aperture as wide as it will go to let in the maximum amount of light. On a kit lens you’ll likely find this is f/3. 5, but set yours to the lowest f/number available. Dial in a shutter speed of 15 seconds, any longer and the rotation of the earth means the stars are no longer points of light, but little white streaks. Set your ISO to 1600, frame up on a part of the sky that has lots of stars and set the focus.
Your camera might struggle to autofocus in the dark, so switch to manual focusing and activate Live View. Zoom into a star on the rear LCD using the magnification button, and set the focus by rotating the focus ring on your lens. To avoid jolting the camera and introducing camera shake to your shot when you press the shutter, use a 2sec self timer or a remote shutter release.
Take a shot and inspect the results on screen. If the scene looks a little dark, try incrementally increasing your ISO, first to 3200 and then try 6400 and see how much detail your camera can capture. Be aware though that at the higher ISOs you’ll encounter lots of grain in your image. For the best results it’s best to shoot RAW files and process your images in Lightroom or Adobe Camera Raw.
For this shot the camera was set to 15sec, f/2. 8 and ISO 3200
To capture the detail of the Milky Way you need a dark location and ISO 6400
Light painting
Here’s a technique that’ll really get your creative juices flowing: painting with light. It’s very simple to do, and all you need is a darkened room, a tripod for your camera and a torch to illuminate your chosen subject. To start off, place your subject on a tabletop – you can paint anything with light but I've chosen some flowers from the garden. Fix your camera to a tripod and frame up on your subject. Next you’ll need to set the focus, and once this is done switch the focus to manual mode so it remains locked in place. For your camera settings, set the ISO to its lowest setting – usually this is around ISO 100. Set your camera to Manual mode (M on the mode dial), set your aperture to f/16 and your shutter speed to 10 seconds. Now you need to draw all the curtains and blinds to stop any light entering the room, so the only light affecting the exposure is the light shining from your torch.
Take a test shot and check the frame is entirely dark. If you can see any detail, increase your aperture to f/22 and test again. The image should be entirely black. Set a 2sec self timer delay and press the shutter button. Once the exposure starts, begin shining your torch on your subject, painting it with light on all the areas you want illuminated. When you hear the shutter close, take a look at the results on the back of the camera. You’ll see your subject beautifully lit up, with everything else in pitch black. If you didn’t have time to paint all of your subject, repeat this process to illuminate the missed areas. You can then load your files as a stack in Photoshop and switch the blending mode to Lighten, this will take the brighter parts from each image and blend them together to create a perfectly painted shot. When you’ve finished, click Layer > Flatten Image and save your new file as a JPEG.
Try out painting with light and see how addictive it is!
. digitalrev.com2017-8-1 03:00